As I have a wind turbine and PV solar panels installed at home, a pure electric car or electric vehicle (EV) would be a compliment to the system, I’m hoping the range will be around 50 miles, enough to get me to Shrewsbury and back.
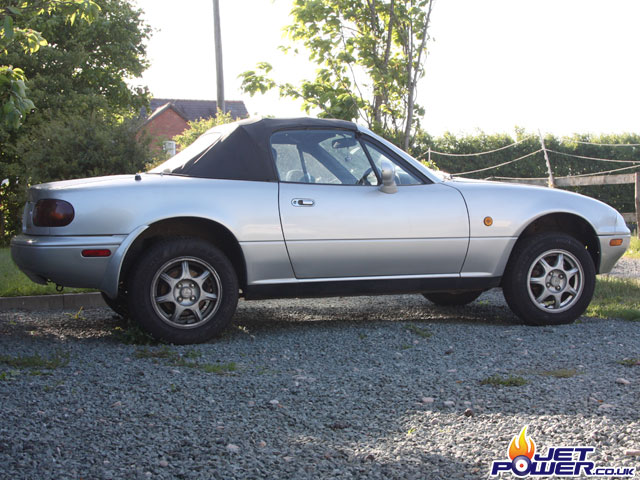
This is my chosen car for the EV conversion, a Mk1 Mazda MX5 or more technically as it is an import a Enous Roadster. The previous owners had a radiator leak and did not stop driving the car which resulted in melted pistons and totally destroying the engine, a little annoying as the true damage was only found out when I got it home and the engine removed. I was hoping to be able to sell the engine to help fund the project. The paint work has been polished with sandpaper and the rear springs were broken. Still, nothing that cannot be mended.
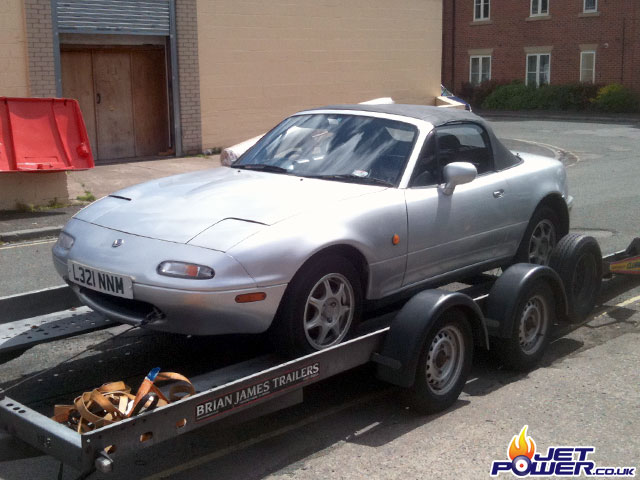
The Mk1 MX5 has a kerb weight of approximately 1000Kg, as the weight of an electric car is very important, it is vital to remove anything that is no longer required as an EV conversion can almost double the weight of the vehicle. Once the main components were removed the car was weighed and it came in at 690Kg, thus I had 310Kg saving to start of with. I’m hoping the finished car will not weight more than 1150Kg, which is currently my target weight. The picture above shows the car riding high with the original drive train removed.
I thought that it would be appropriate to add some pictures of the car having its part’s removed (sounds painful). The image above is taken from underneath looking upwards from the rear, the differential, prop shaft, exhaust and fuel tank have been removed, this is the proposed area that the motors will live.
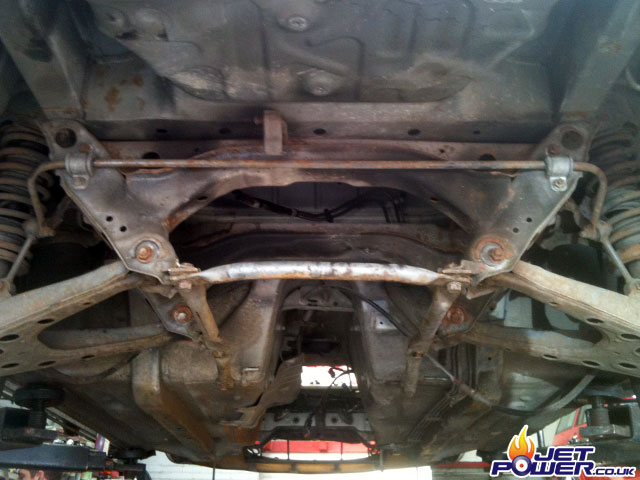
The easiest way to remove the engine was to drop it down on top of the front sub-frame, it was a good opportunity to have a good look underneath the car to work out where everything EV was going to go.
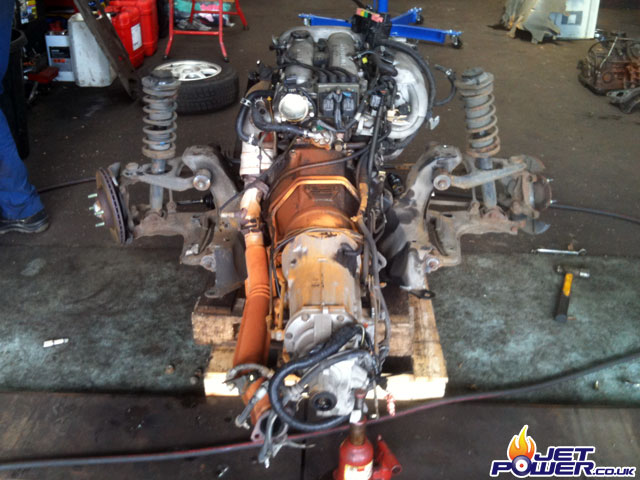
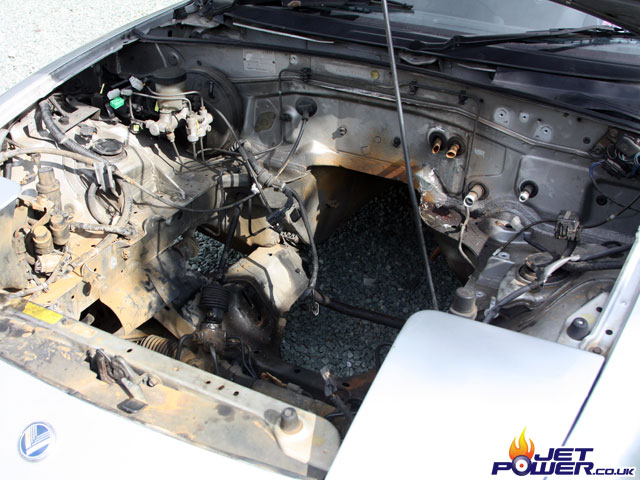
This shows a vast amount of space where the engine and gearbox used to live, the coolant radiator and air conditioning heat exchanger have also been removed. The engine bay will be cleaned up to remove the rusty water deposits and the sub frame cleaned of oil and grease.
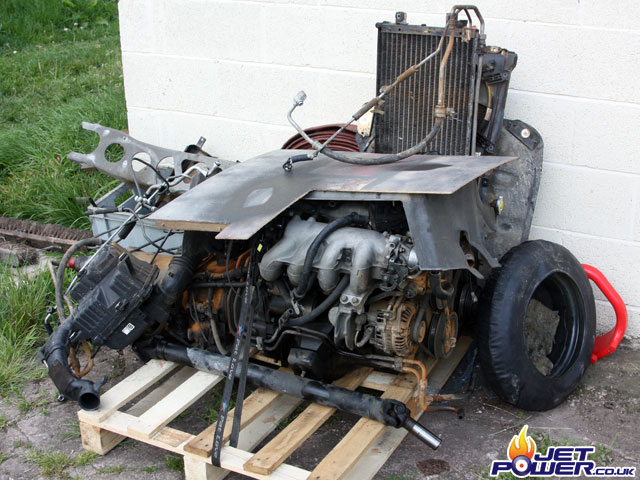
Apart from a few bits and pieces here and there, this pile accounts for all the parts no longer required, time to list some of them on eBay to recover some money.
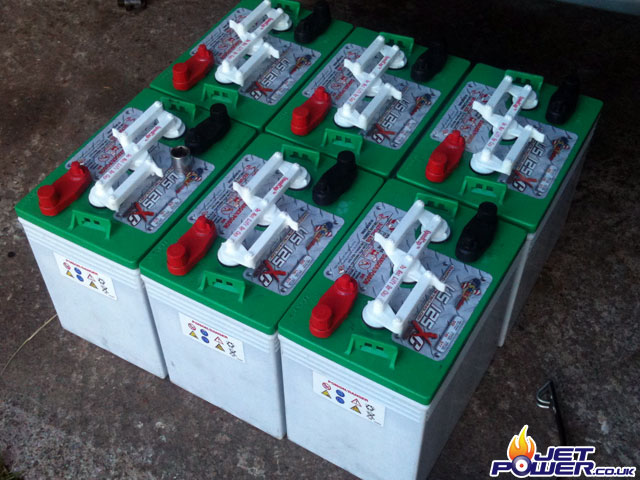
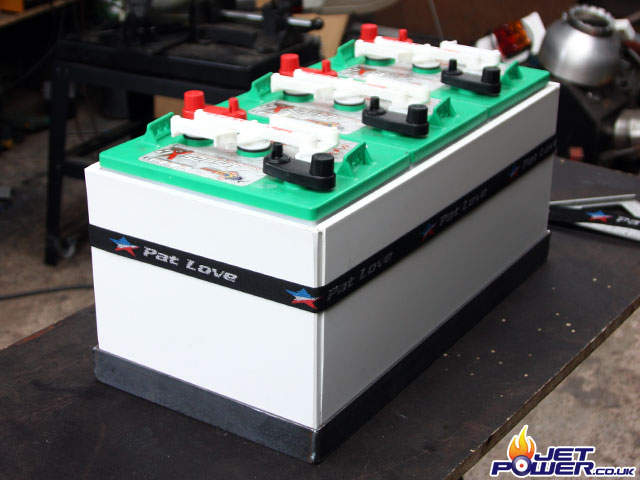
For the first part of the conversion I had to decide on the type of battery’s to use, Lithium type battery’s are the obvious choice if you want a light weight and efficient battery, but are currently extremely expensive. Because of a limited budget, I have opted for the Lead Acid type, heavier but substantially cheaper. I have spoken to a few people in the know and I have come to the conclusion that 12x 6volt, 242Ah batteries providing 72volts would be my best option. I decided that a model made by US Battery’s would best suit my needs, they weigh in at 30Kg’s each, thus the total power pack is going to weigh 360Kg’s. Six of the twelve battery’s that will be required.
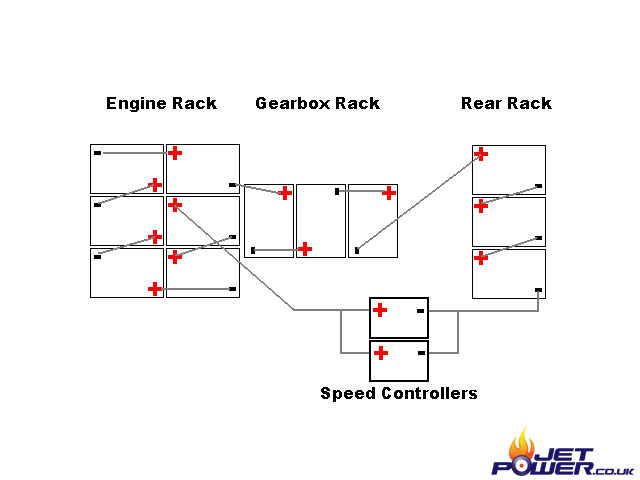
Now that the battery type has been chosen, I have to work out the best weight distribution around the car, ideally the same proportions as it’s factory build weight which were about 50/50. As well as the battery’s, the two PMAC drive motors and speed controllers weight will have to be taken in to consideration. So here’s the plan, six battery’s inside the engine bay, three where the gearbox used to be and three in the boot, the motors are going to be rear mounted, thus hopefully balancing the car nicely.
Pictured above is the start of the front battery rack, made from 4mm x 40×40 angle, it should be plenty strong enough to hold the six battery’s placed on top of it, I have to keep reminding myself that weight is a key factor in this conversion.
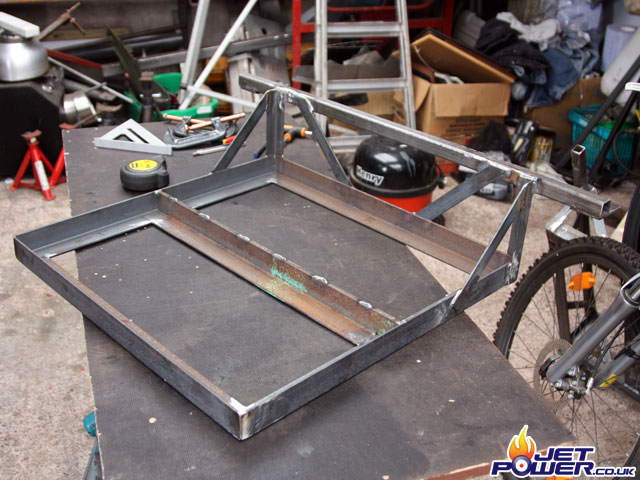
Front battery rack fabricated, it’s worth noting that the rack was made 10mm larger on the sides between the battery’s and the rack contact points so that Foamex Board could be added as an insulator, this will help protect the battery’s in colder weather, a necessity as the charge can be hugely reduced in the winter months, the battery’s are also insulated from underneath with Foamex.
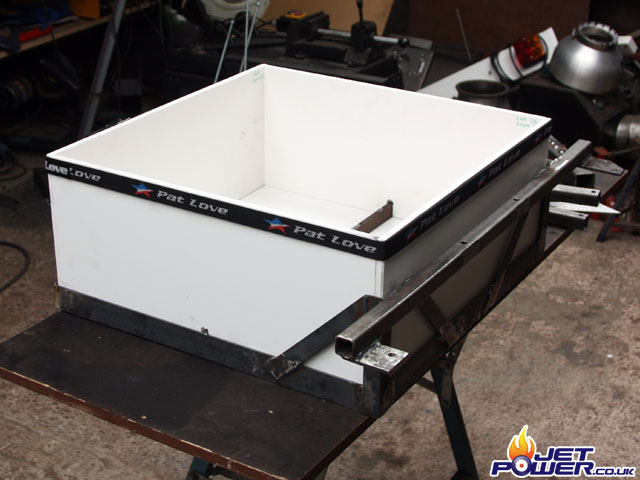
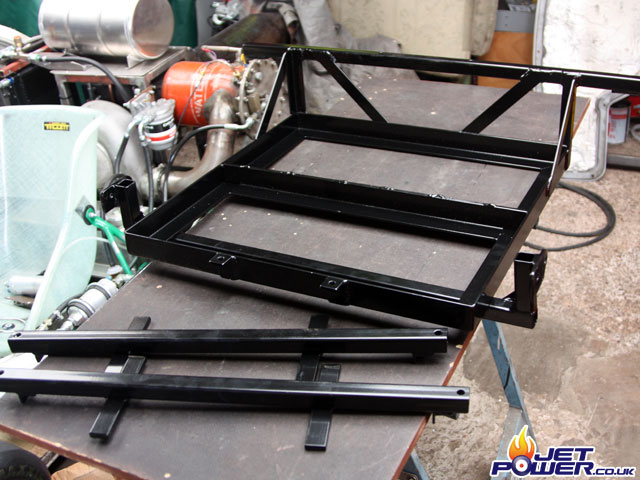
The front rack after a trip to the powder coaters, it would have been quicker and cheaper to paint it, but a good powder coat job is worth it’s weight in gold (my opinion of course) as you get an even finish that is extremely durable.
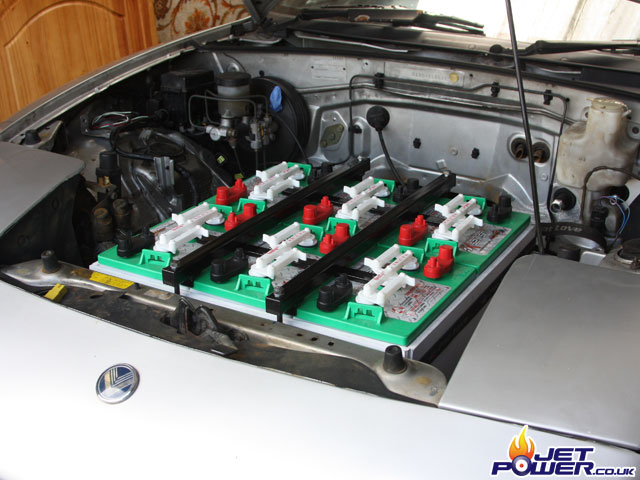
All six battery’s now in place and secured by metal straps running from front to rear of the rack. Tension is added by the use of four M8 studded bars.
The gearbox located battery rack will sit just below and behind the engine battery rack and consist of three battery’s. The retaining frame has been made enlarged slightly to allow 10mm Foamex to be added to the extremities, as I did with the engine rack above to aid insulation in colder weather.
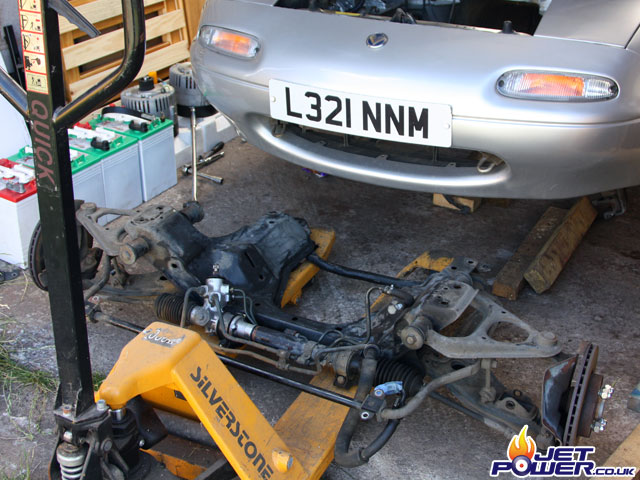
Fabricating the gearbox rack, which will bolt directly on to the MX5’s front sub frame was going to be a little awkward with the sub frame in place, so while I looked after my little girl, Will kindly (with a poke) removed it for me. I considered this quite an easy job to do.
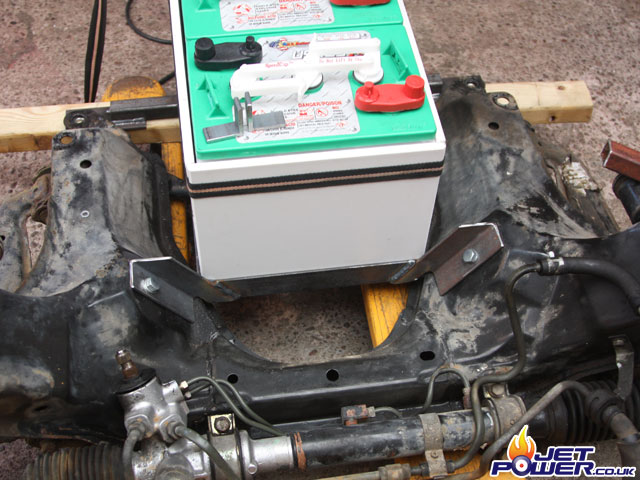
I had to make a mistake sometime and that mistake was not measuring the depth of the gearbox tunnel correctly, unfortunately it will only take two battery’s not three as I had planned. As there isn’t a lot I can do about it now I have re-made the battery holder to take just two battery’s, I will have to give a little thought where the third battery is now going to live, a minor setback I hope.
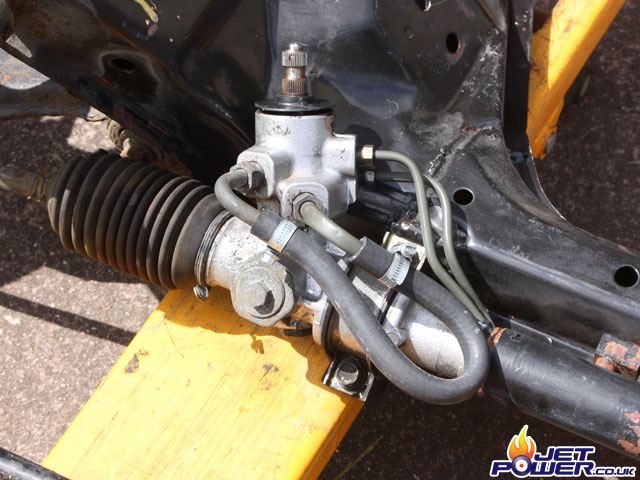
The original car configuration had power steering, as power steering is a source of power drain I am not going to make use of it. As a quick workaround I have cut the supply and return pipe to the pump and joined them together. When I get more time I will either replace the rack with a standard unit or modify the original power steering rack.
Modified gearbox battery rack in it’s place, fits like a dream, i’m just a little concerned where to find the space for the other battery.
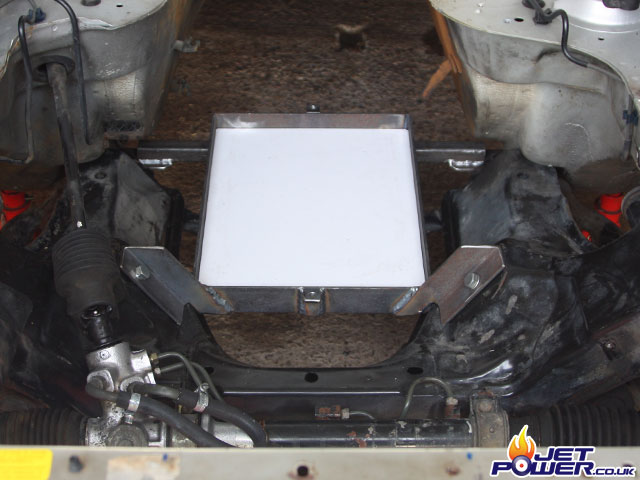
Front battery’s and gearbox battery’s in place.
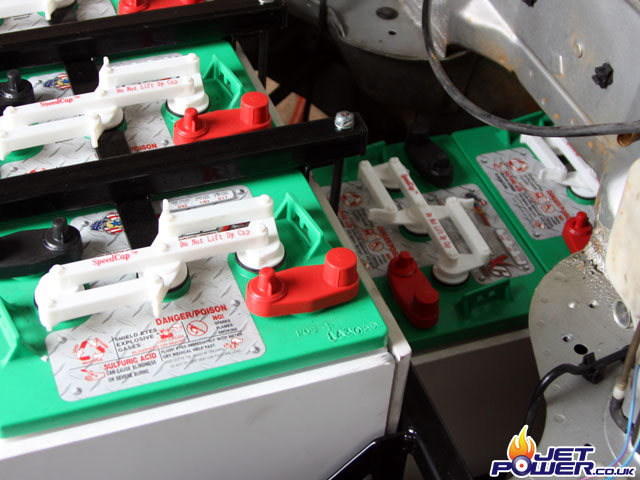
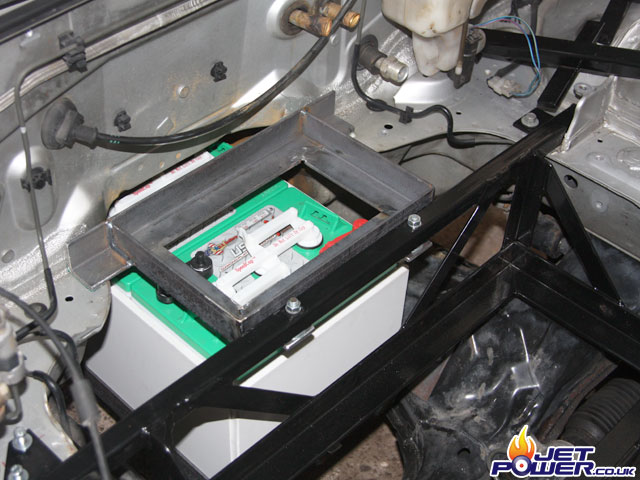
I have now decided on the location to fit the ninth front battery, this is the one that was meant to go as a pack of three in the gearbox’s location. It will fit just behind the 6 battery rack and above the gearbox rack. This does increase the COG slightly, but as I see it I don’t really have another viable option.
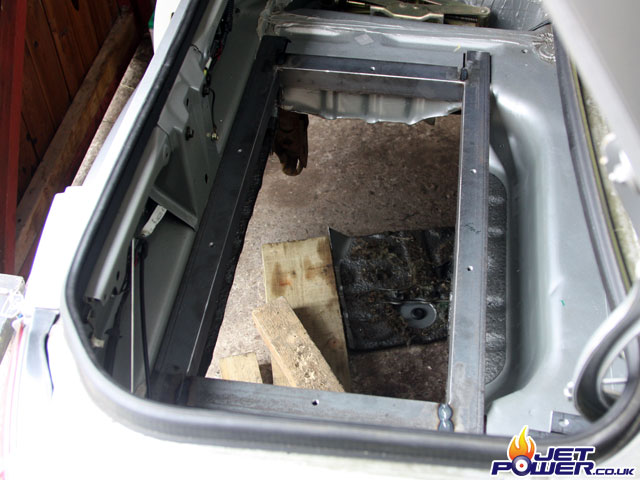
The remaining three out of the twelve battery’s will live at the rear of the car. A hole cut out large enough for them was made using a 1mm cutting disc and I have to say was a little awkward due to the angled sides of the boot space.
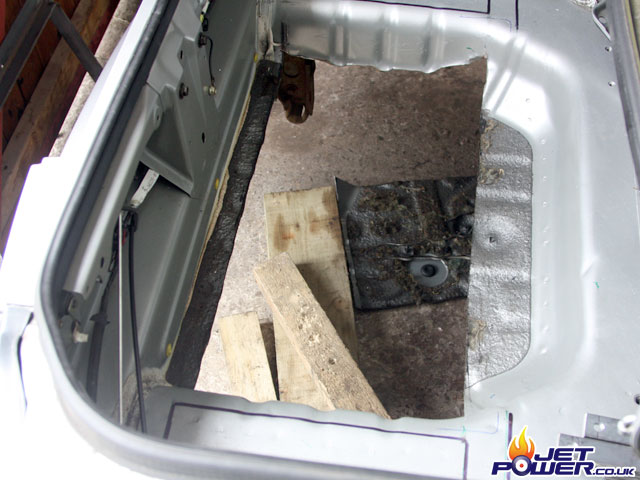
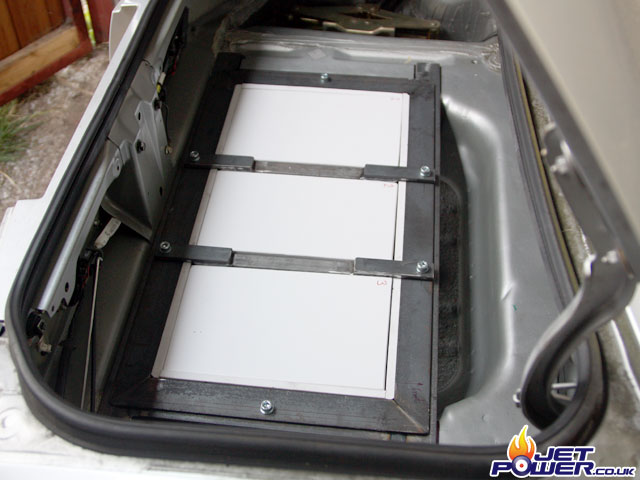
Then a frame made from trusted 40mm angle was fabricated that sits in to the hole, the idea being that this will actually become part of the car and then support the the rear battery frame slides in to it.
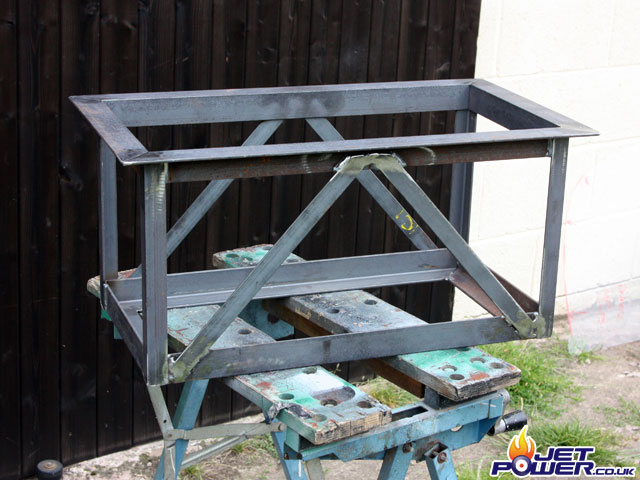
The battery frame itself is made from 40mm & 25mm angle and some 25mm flat bar, like the other battery racks it is oversize to allow the use of foamex board for protection and insulation.
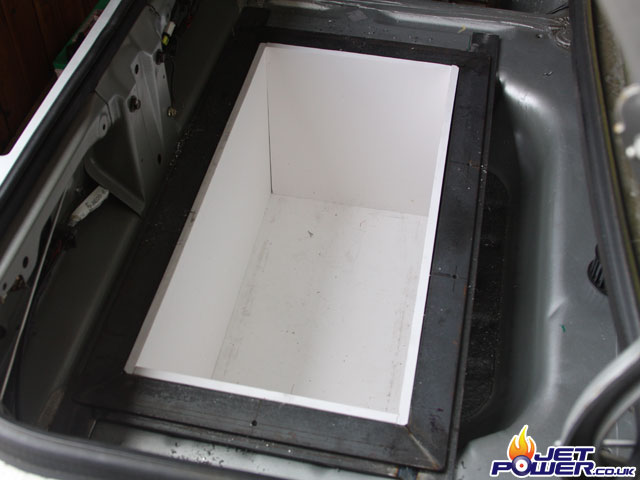
This picture shows the foamex board sitting in the battery retaining frame, which in turn sits in the securing frame shown earlier.
And here is proof that all the battery’s fit.
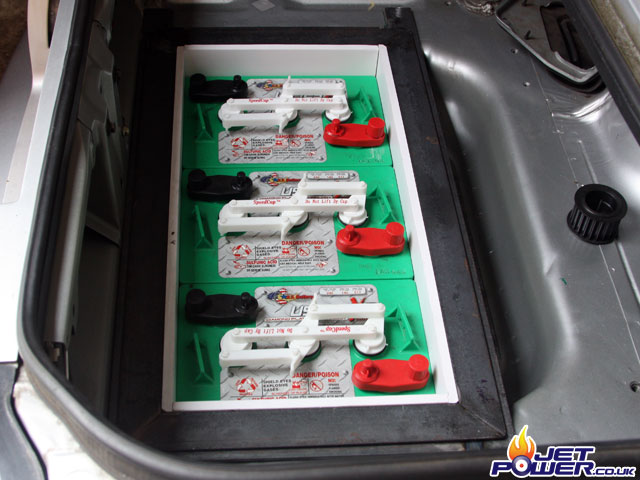
Two bars that run across the battery edges will stop the battery’s falling out should the car overturn.
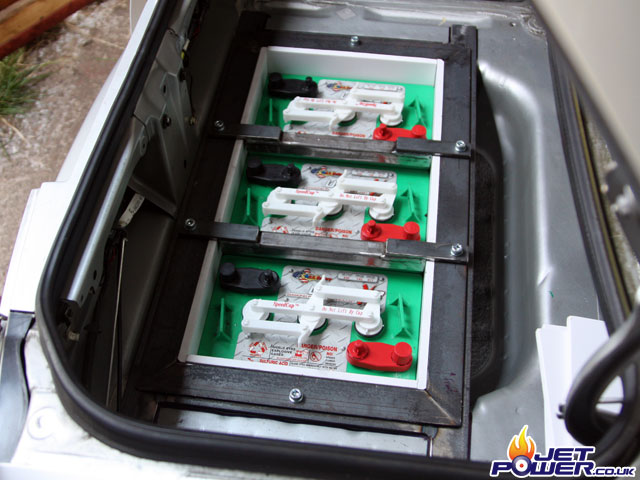
Spare pieces of foam insulate the top of the battery’s. Carpet can now be laid over the top of the pack, almost hiding them from view. A trip to the powder coaters and that’s this part done.
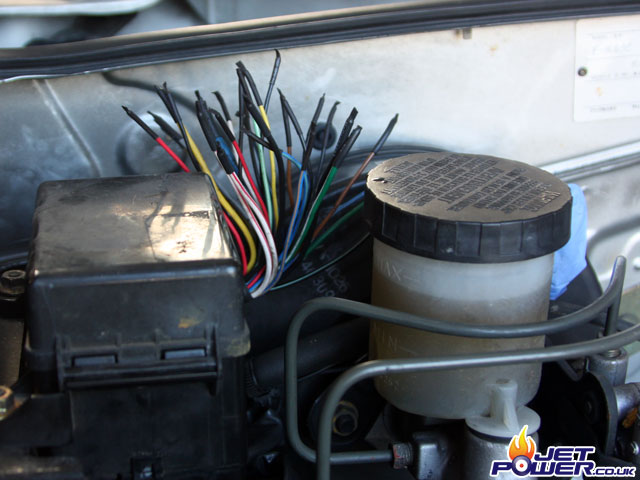
To tidy up the unused cabling that would have originally gone to the engine, wires were traced back to the bulkhead and fuse box and if not required they were cut short and insulated with heat shrink, then bundled in convoluted tubing and tucked out of the way.
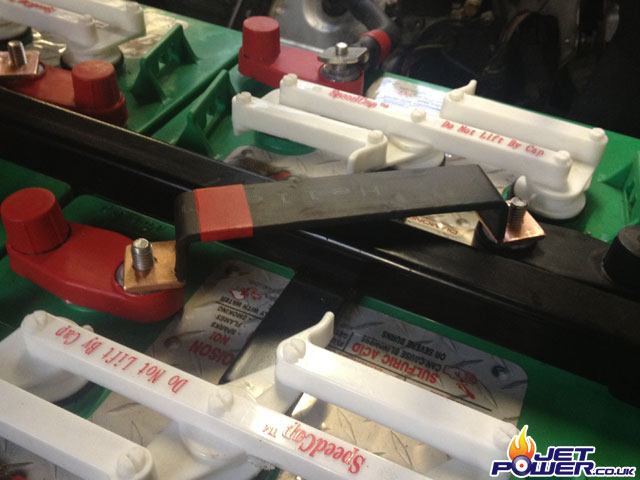
To join the battery’s together I have opted to use 25mm x 3mm copper flat bar, where the terminals are not to close together the I will be using 95mm welding cable. Here you can see the bars have been insulated with large heatshrink.
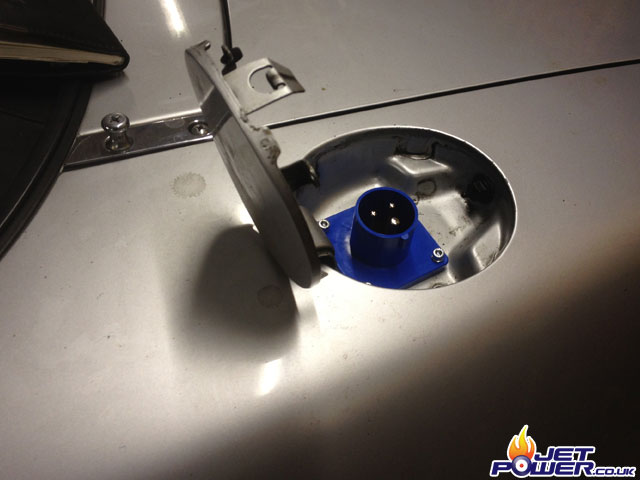
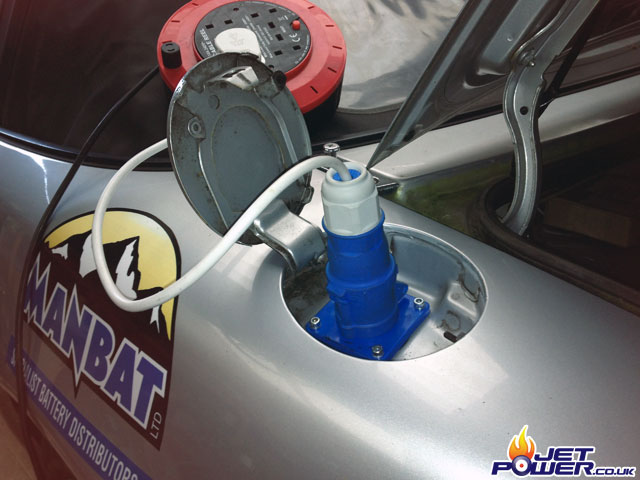
It’s like Mazda designed the MX5 to be an electric car, this picture shows the 16amp charging socket, it just fits like a dream, great stuff really, the hammer wasn’t even needed.
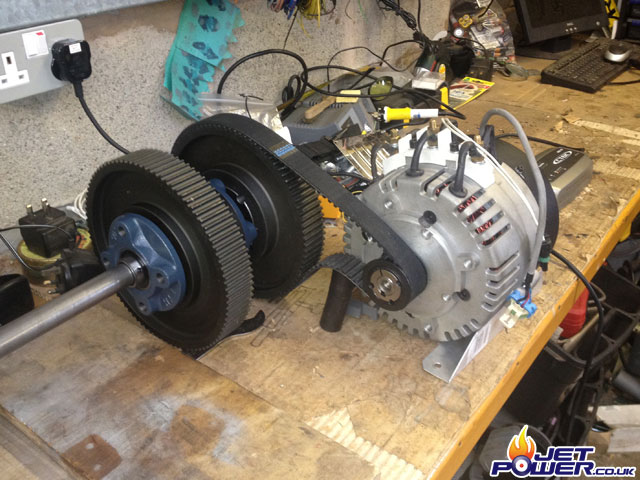
Pictures are the two motors that I have elected to use. They have an output power of 10 KW continuous, 24 KW peak each and are of the DC brushless variety.
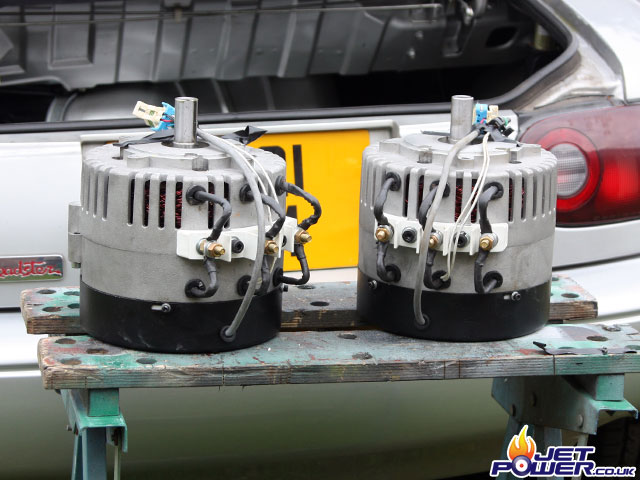
The max rpm speed of the motors is rated at 5000RPM, I need this to equate to about 1000RPM at the wheels, so some kind of reduction is required.
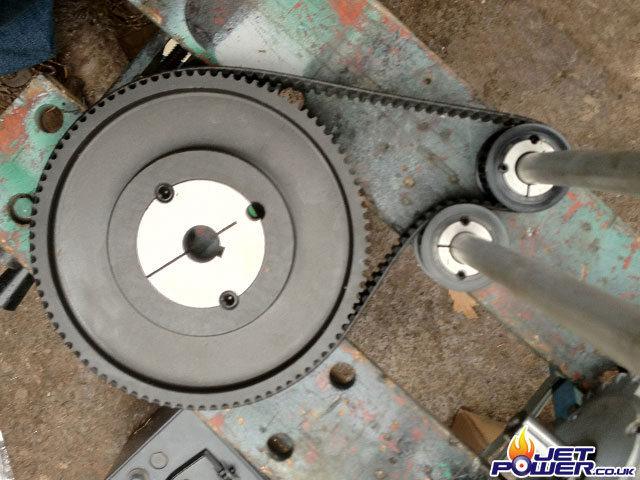
I have tried chain drive in the past and have found it to be noisy, thus I am now going to give belt drive a try. 22 tooth to 90 tooth, 8mm pitch timing pulleys are being used in this case as pictured.
Self centering bearings in cast housings are being used and although it may look like it, the picture shows two shafts, not one long one. This is required as there is no differential, effectively each motor drives a rear wheel.
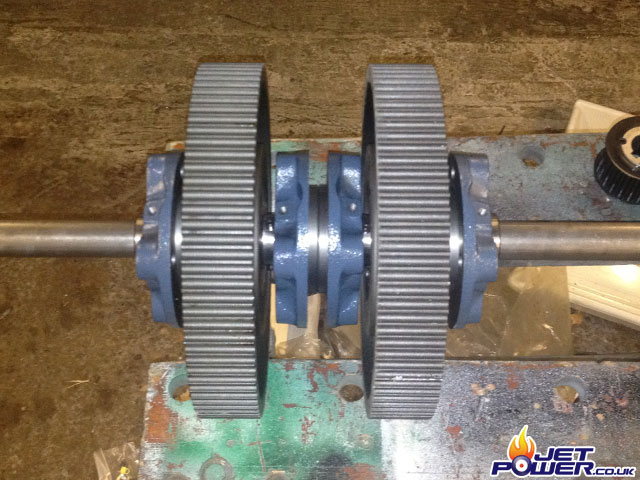
A simple mock up to get an idea on how the transmission frame will look.
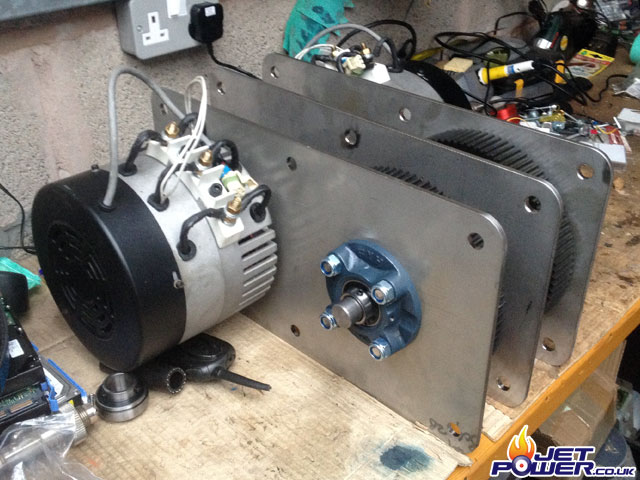
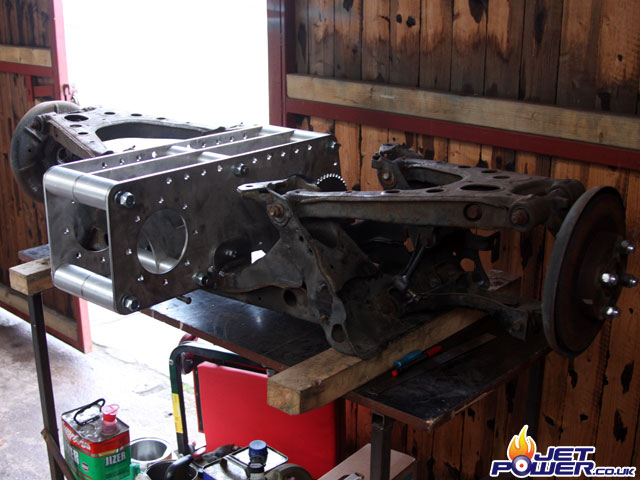
The transmission plates were designed and cut using a laser process, spacers will separate and gold rigid the three plates.
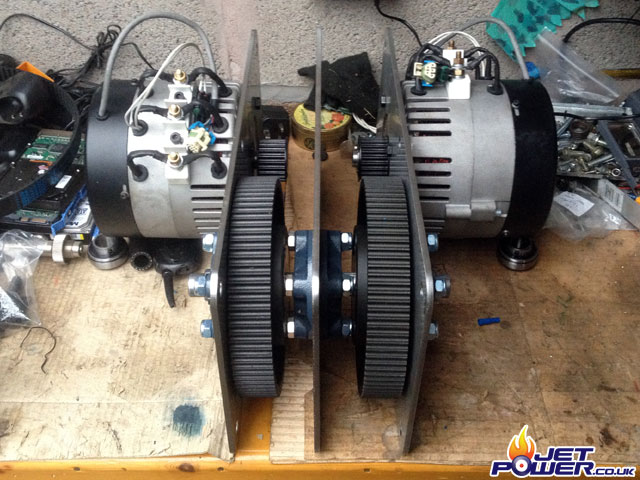
The stubs showing just at the end of the bearing housings are where the drive shaft mounting plates will be attached. I then, with he help of Will removed the rear sub frame and then it became evident that I had made error number two. The nice stainless transmission frame doesn’t fit the sub frame with out fouling on the car body. New transmission plates need to be designed, angry with myself about this, silly mistake.
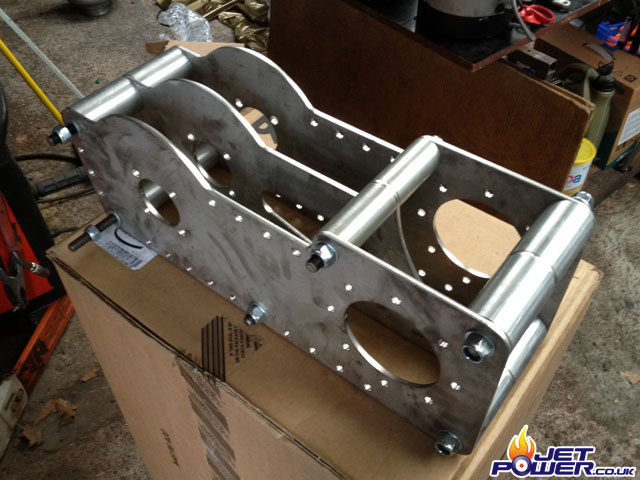
So I made more measurements and had Will draw them up in CAD for me, these plates were then laser cut at Rednal Pneumatics and hey presto, another transmission. Hopefully these will do the job.
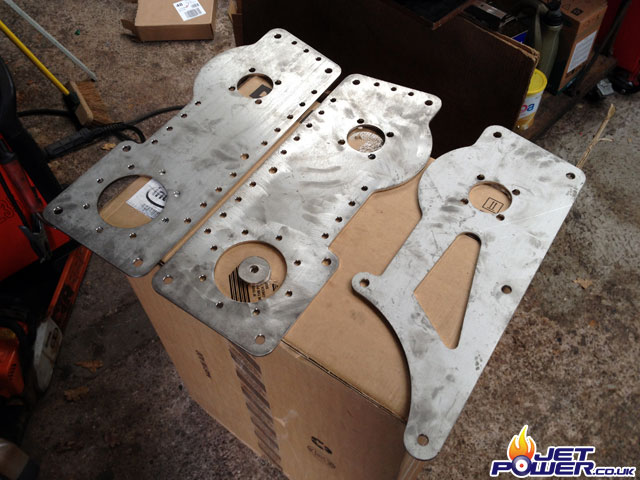
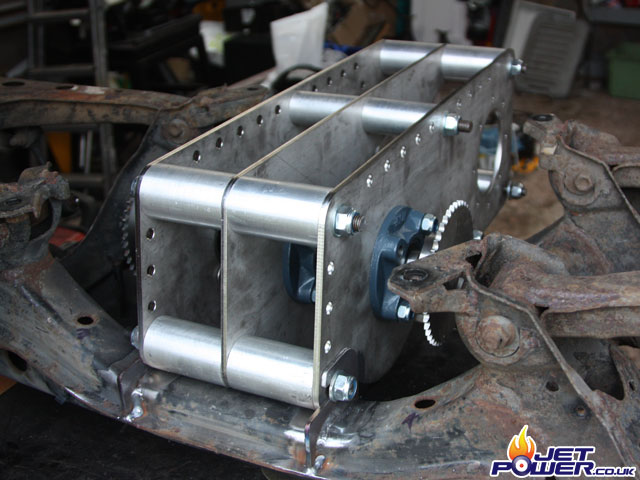
This image shows the plates assembled with the alloy spacers in place, the next job is to attach the assembly to the sub frame.
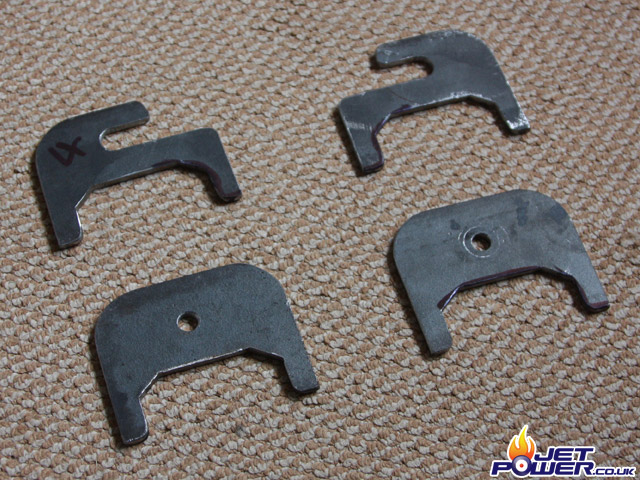
Four brackets have been made from 5mm thick plate, which have been profiled to the shape of the underside of the sub frame.
Carefully I welded the plates to the sub frame making sure that all was lined up and as square as possible.
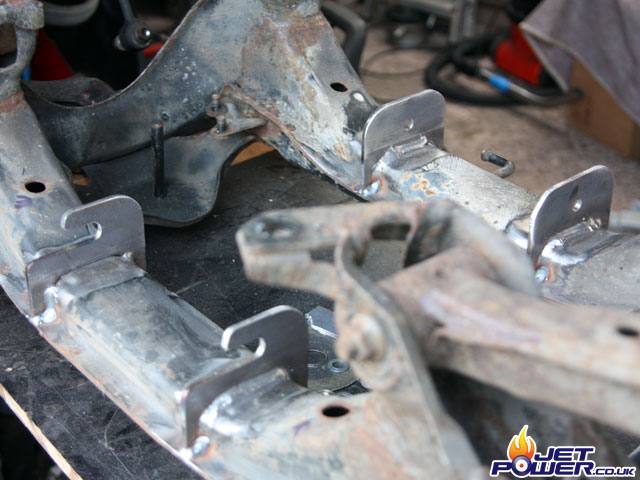
The lower spacers that you see in the picture above will be removed and really have just acted as a jig.
Bear in mind the the sub frame is upside down and facing forwards.
Motors attached and checked for clearance.
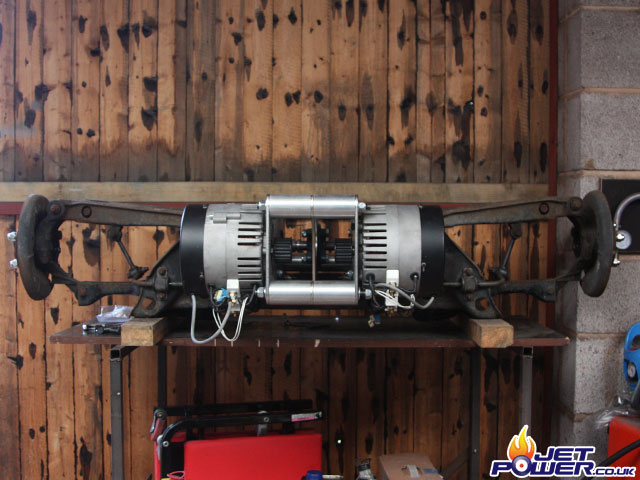
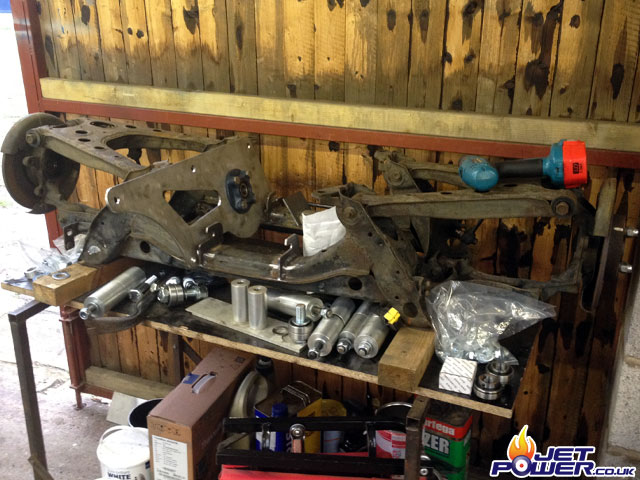
I’m still having ideas on different ways of doing this, I suppose I haven’t really decided on the final way that this will be finished.
Time to get on with the drive shafts. To make life easier I bought a couple of Taper Lock Sprockets and had some 25mm bar keyed. Anything to speed the project up, having TWO children definitely slows your project making abilities down.
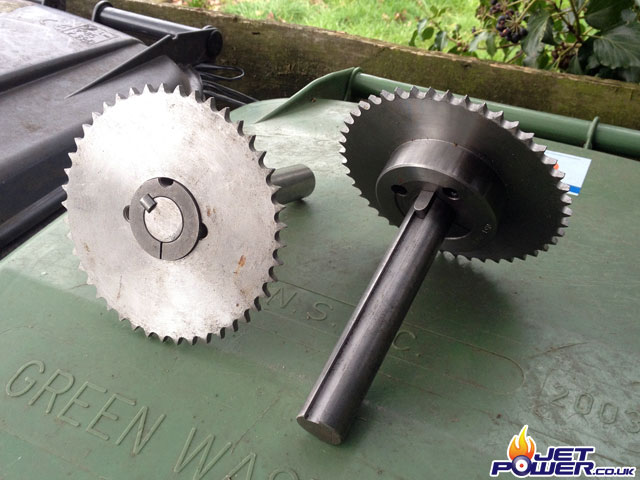
Then a machinist named Graham Butters machined them down for me, thank you Graham, they now fit the CV Joint on the Drive Shaft perfectly.
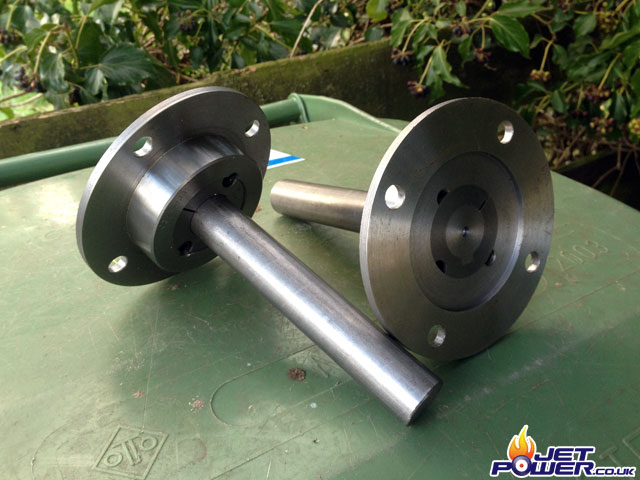
Drive Shaft slid in to place on the Transmission..
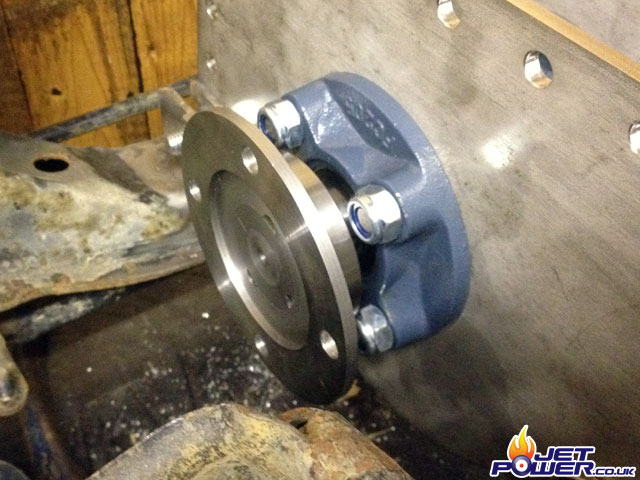
This is where it got a little complicated. The transmission now fit’s the car like a dream, the motors don’t touch anything and everything is well proportioned. well, apart from the availability of the correct size of drive belt that is. To overcome this problem I have installed an idler pulley, this takes up some of the slack and seems to do the job, it is made using two bearings, a cheaper and more solid way rather than trying to source a factory built unit.
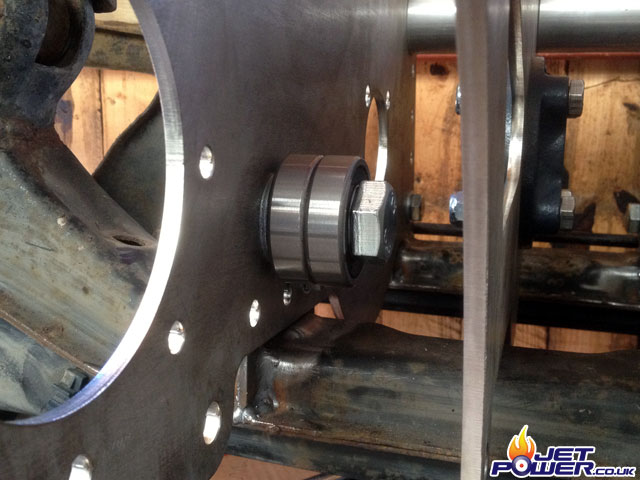
And for the belt tensioning I am using a similar principle, but with a home made eccentric tensioner assembly, again using two bearings running side by side.
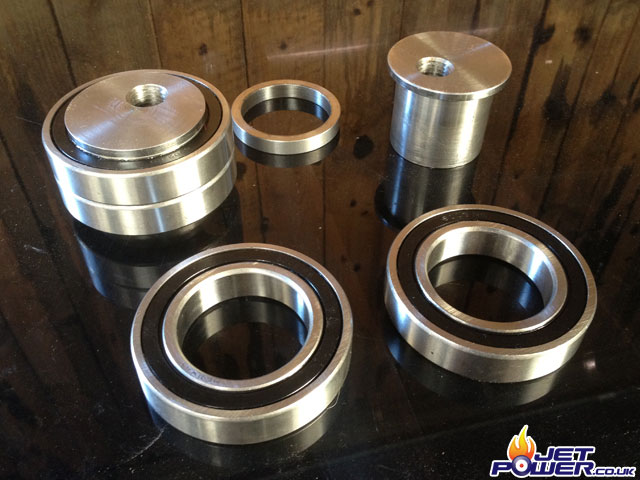
An additional two holes were added that are the profile of a disc grinder spanner, this will allow for easy tensioning of the belt.
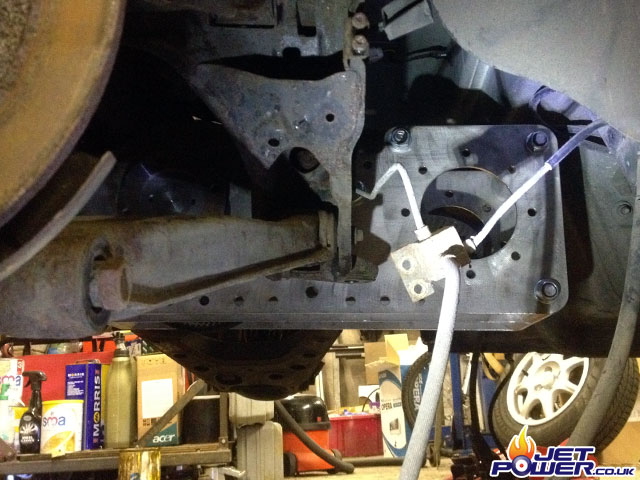
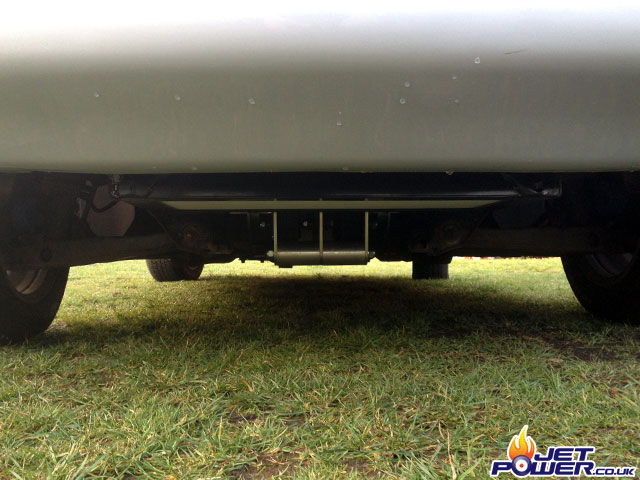
A rear view just to check the ground clearance, which was once a major concern.
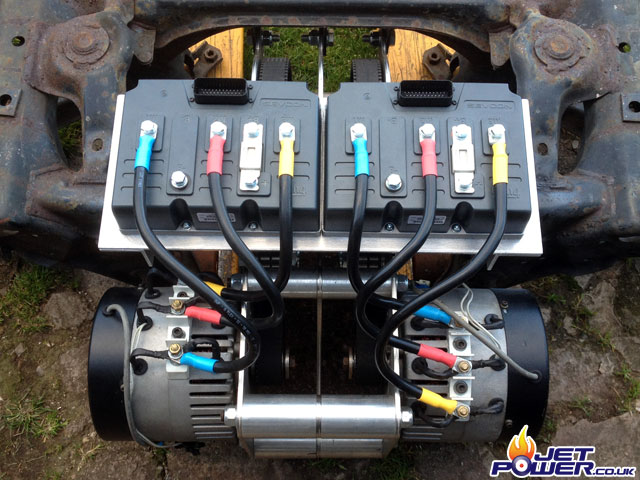
Pictured are the two 72 Volt Sevcon G4 Controllers that I will be using to drive the motors.
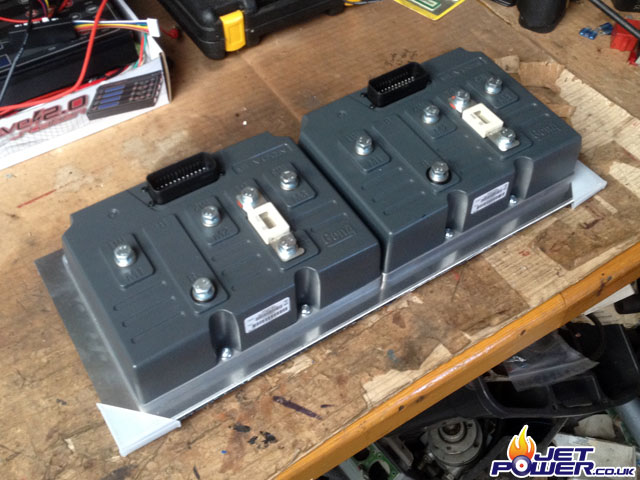
The controllers are to be mounted on to a 5mm aluminium plate which will aid heat dissipation and to give the plate a little more help a heat sink has also been added on the underside using counter sunk bolts.
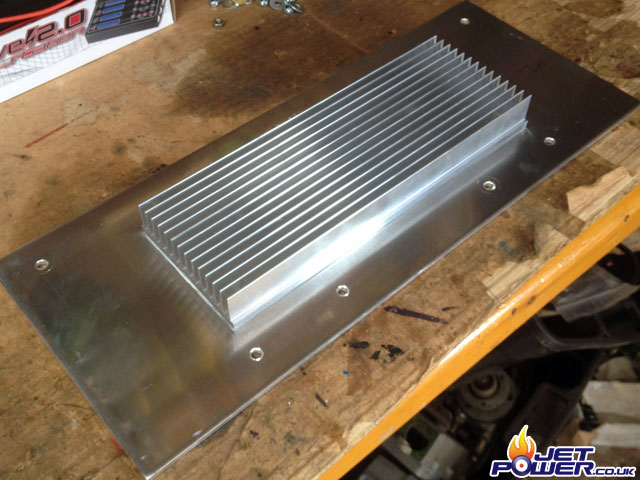
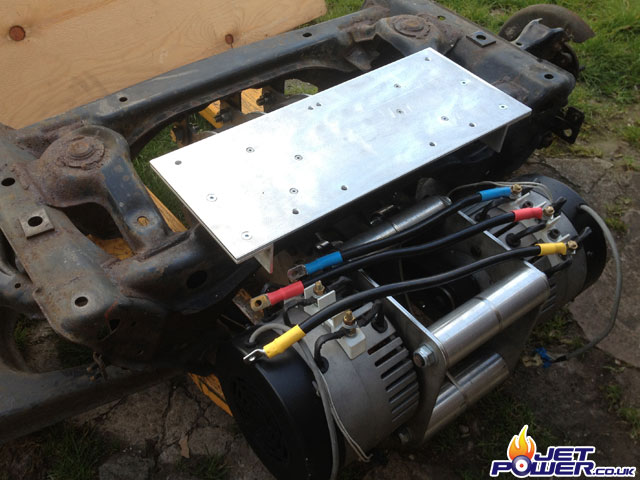
The mounting plates have now been welded to the top of the sub frame which support the motor controller plate.
This picture shows the Sevcon Motor Controllers mounted and power wires connected, ideal really as you won’t get much loss in the wires at this short length and the controllers fit exactly where the fuel tank used to be. Mint!
The charging point has now been wired up, making use of the fuel filler point, a 16amp connector does the job very nicely. I have to say that the Mazda MX5/ Enous has been extremely well designed and does lend it self to a high level of customization.
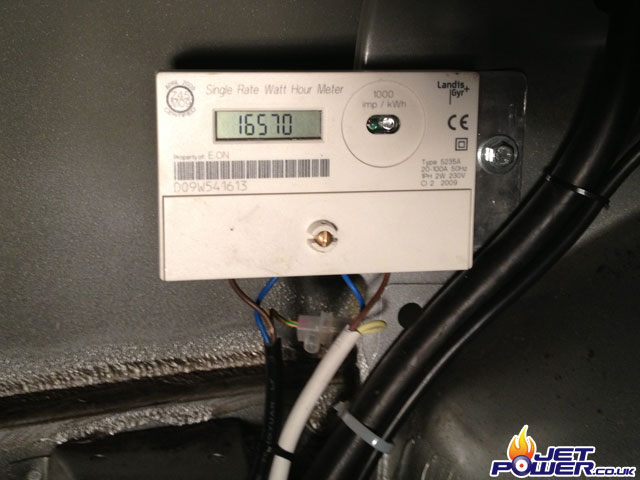
From the charging point on the outside of the car I have wired in a permanently fitted small electric meter. I want to keep an eye on the amount of electricity used and compare it to the mileage that I cover, a test to see if an electric car is really more economical than conventional vehicles.
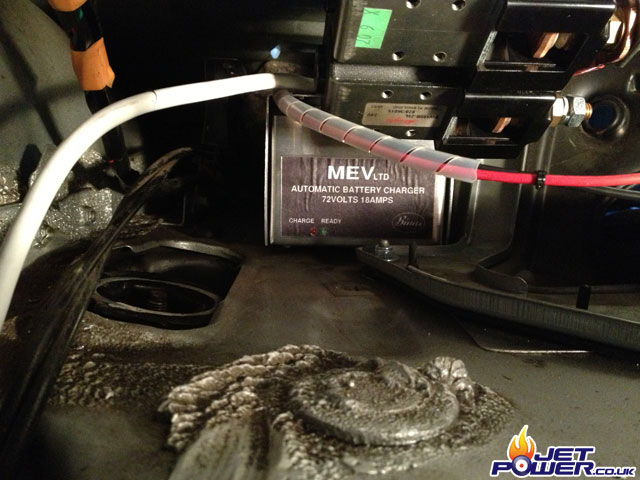
And from the electricity meter to the battery charger, again as you can see made by MEV, a high frequency unit rated at 72volts at a massive 18amps. Like the meter the charger is permanently fitted, so that a top up charge can be administered away from home should the need be.
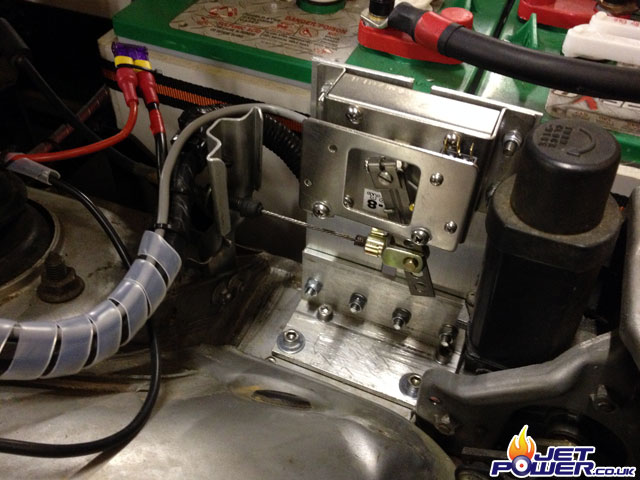
One little job that I have been putting of is the mounting of the throttle pot. Making use of the original coolant water header tank, I drilled a hole in it and hey presto, I have a perfect place to mount the throttle cable, now for the pot itself.
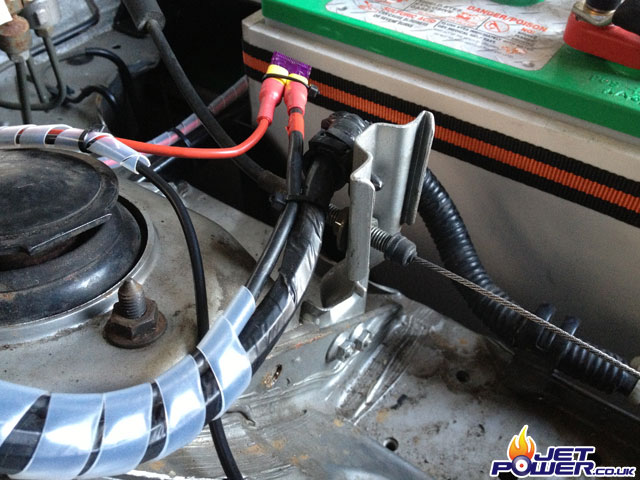
The throttle pot itself was a little awkward to mount, due to the short length of the throttle cable, but after a little playing around I found a suitable spot for it, maybe not the best installation, but it will certainly do the job.
My Dad giving the EV MX5 a spin whilst looking pretty cool 🙂
